Power BI API utilization with Python. Easy peezee...
Suddenly (sarcasm) Power BI has an API that s really useful and in this post i ll share my experience using it. Long story short: it s very easy and extremely useful.
Home made Python class is here*:
Click and just copy:
github.com/rusloc/PBI
* very simple Python class (basically a script packed in a pill).
Process structure
Generally the process looks like this: you create an app, generate secret, create a security group, add your app to the security group, setup your PBI workspace and run the code againt the API.Lets start with the basic app setup.
App Setup
Go to: https://portal.azure.com/
Of course you need a paid Power BI account to proceed (simple PBI pro account will do).
Once you register (login) into your Azure account you ll see something like this:
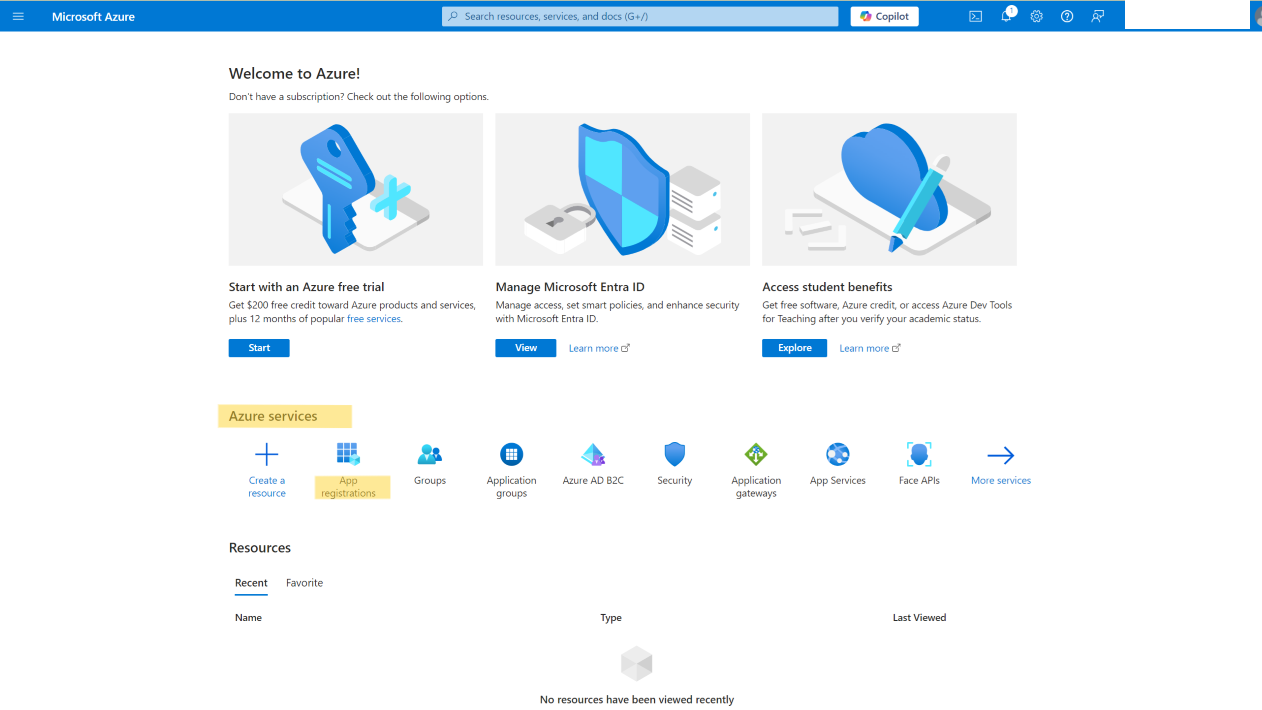
In the middle of the page you ll see a big block "Azure services". In this one you ll need "App registrations" specifically.
Click...
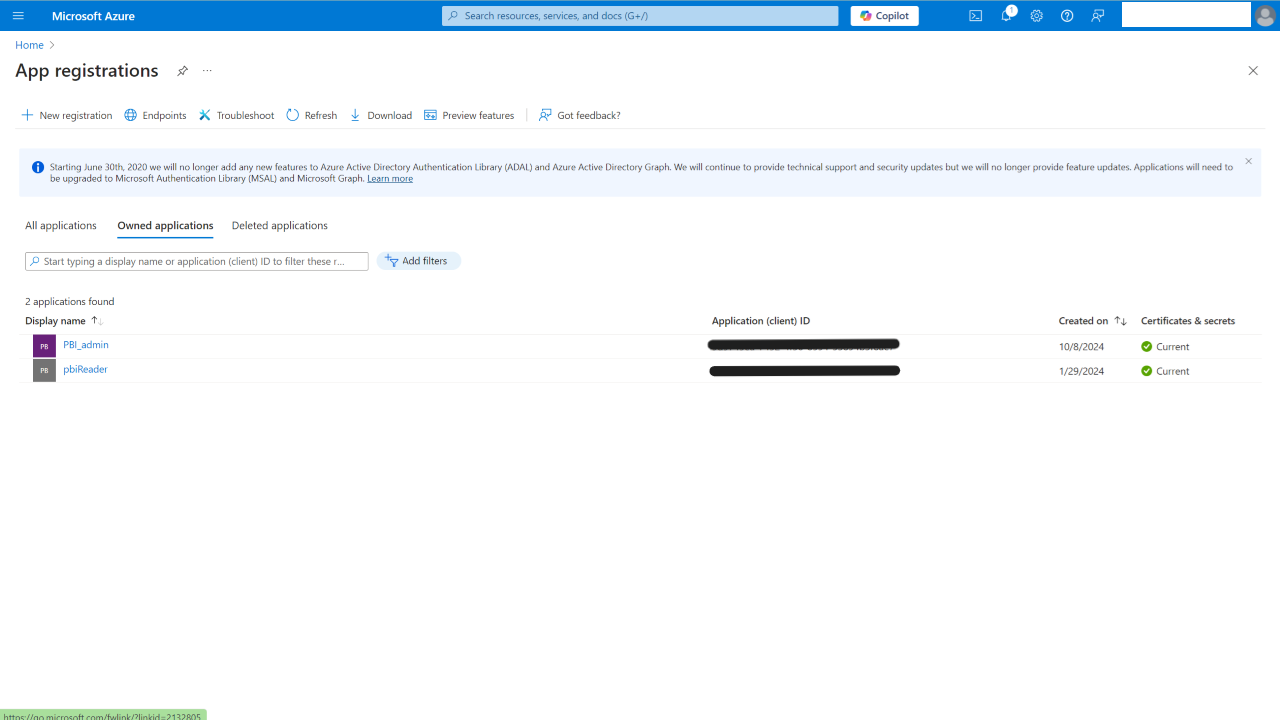
- Enter some info:
- Name: whatever you want
- Supported account types: most likely you ll need the first option with single tenant
- Redirect URI: since it s optional you may leave it blank
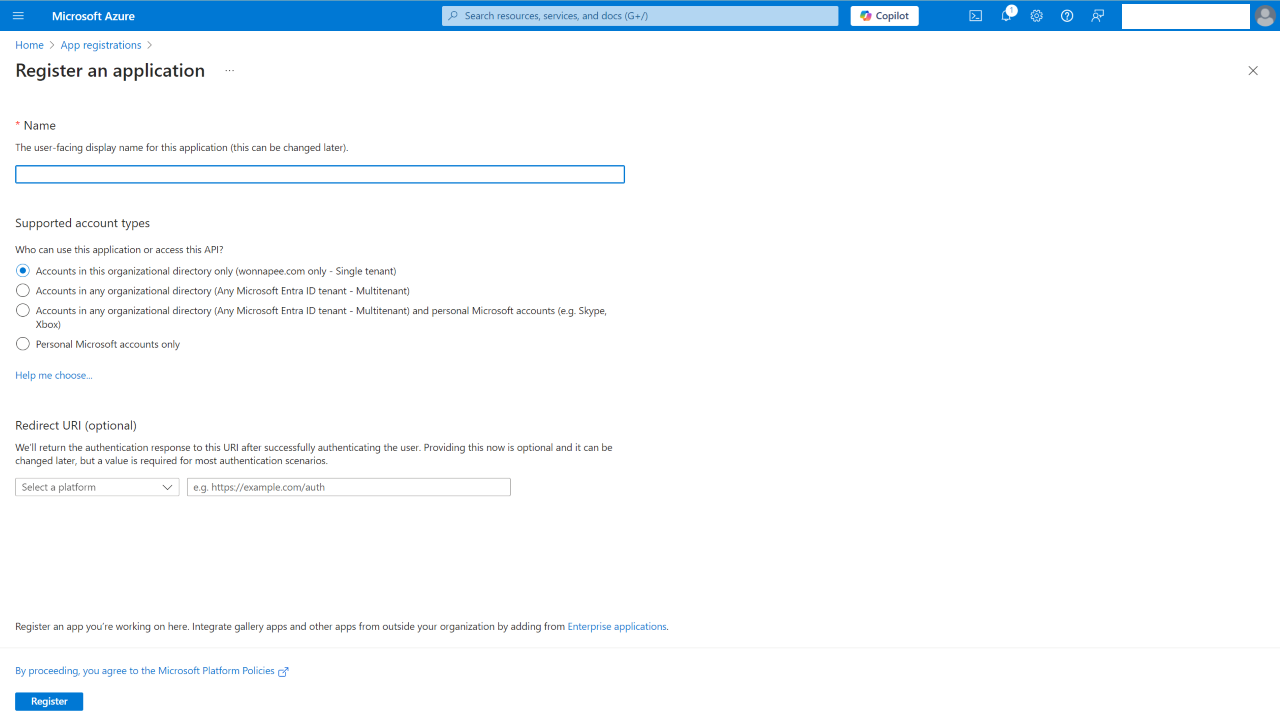
Now that we have the app (hopefully the above steps should not be a problem), we need to do a few more steps to be able to run Python code against PBI API. See the screen below: this is a basic view of the APP settings (most likely you will see something like that). Now we need to get CLIENT SECRET and CLIENT KEY.
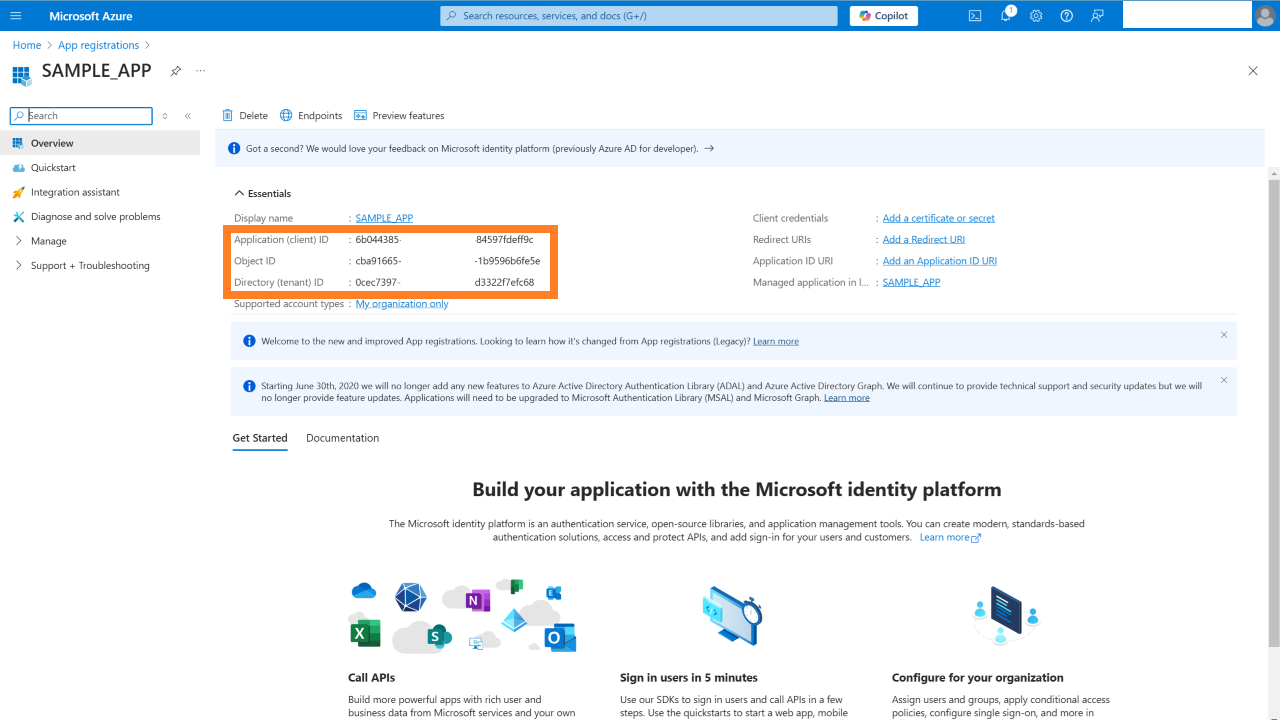
After saving those two IDs we now can go and get these two guys: CLIENT SECRET and CLIENT KEY. To do that: expand the MANAGE section (on the left pane). Once you expand the section you will see the screen:
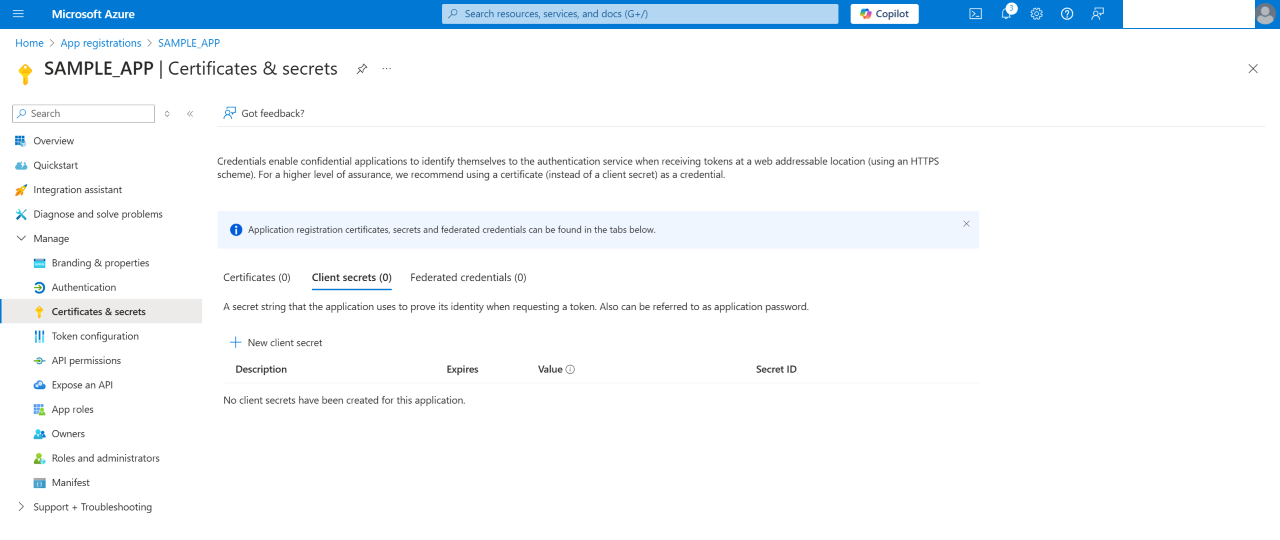
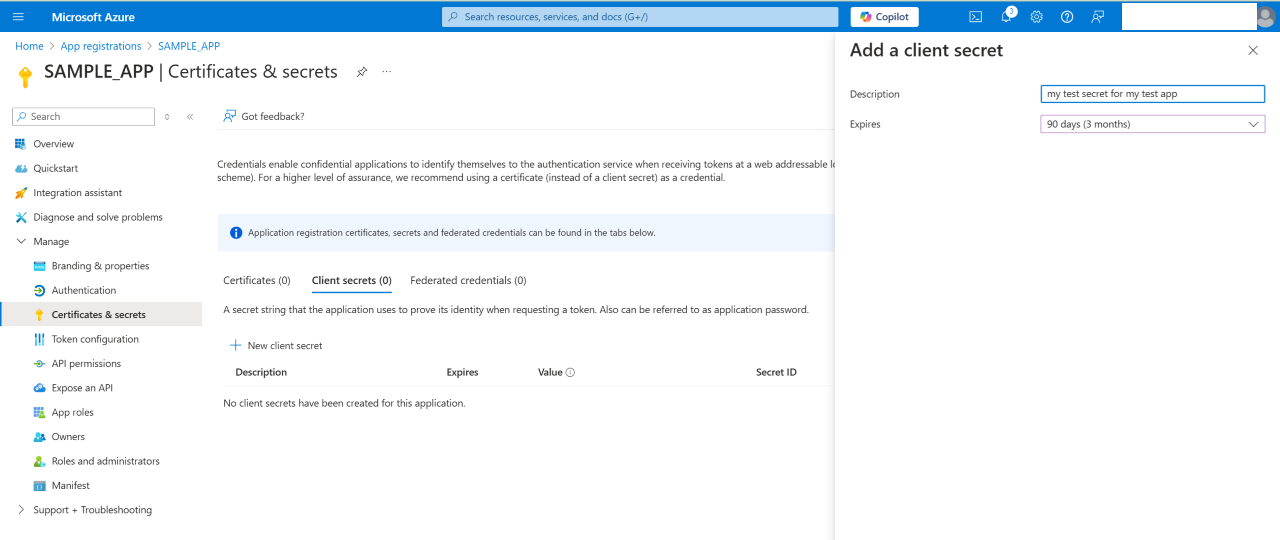
Now we need to get those secret values. There might be a little confusion on this step so let me tell you:
Just right when you click Add button in the pop-up window you will be able to see the Value of the Secret ID. So DO NOT
rush. Copy and save those two: Secret ID and Value.
Security Group Setup
Now we need to refer to [screen 1]: find the Groups section in the menu and click. If you fail to find the Group section then just seach for one:
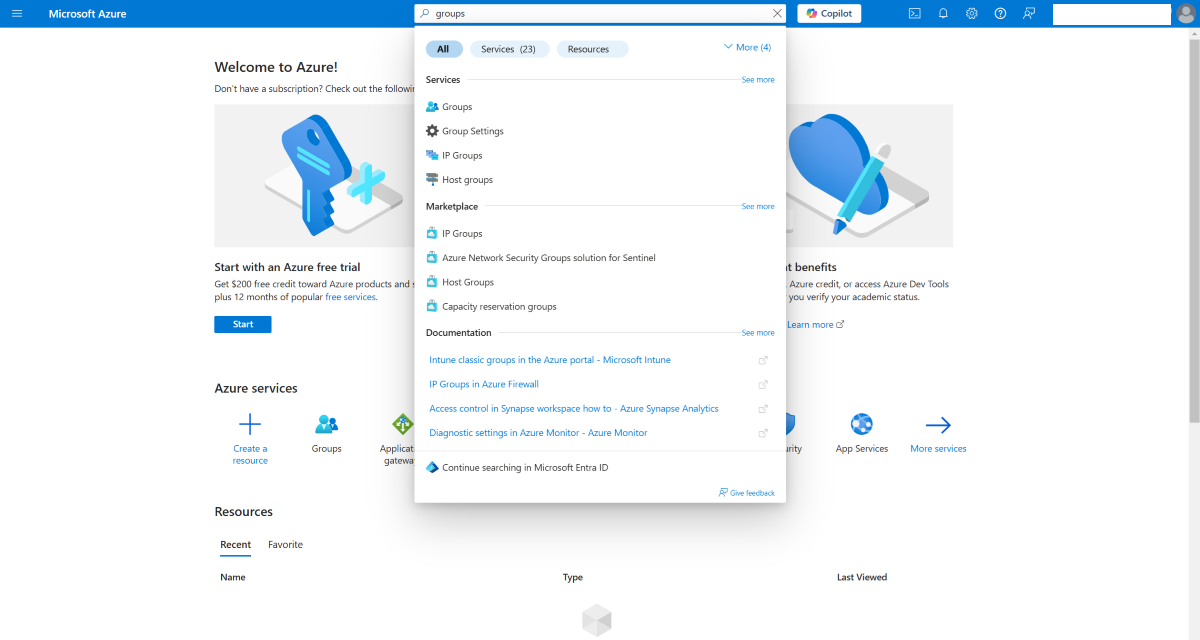
Once you get to the Group page you ll need to select All groups and then click in the top New group.
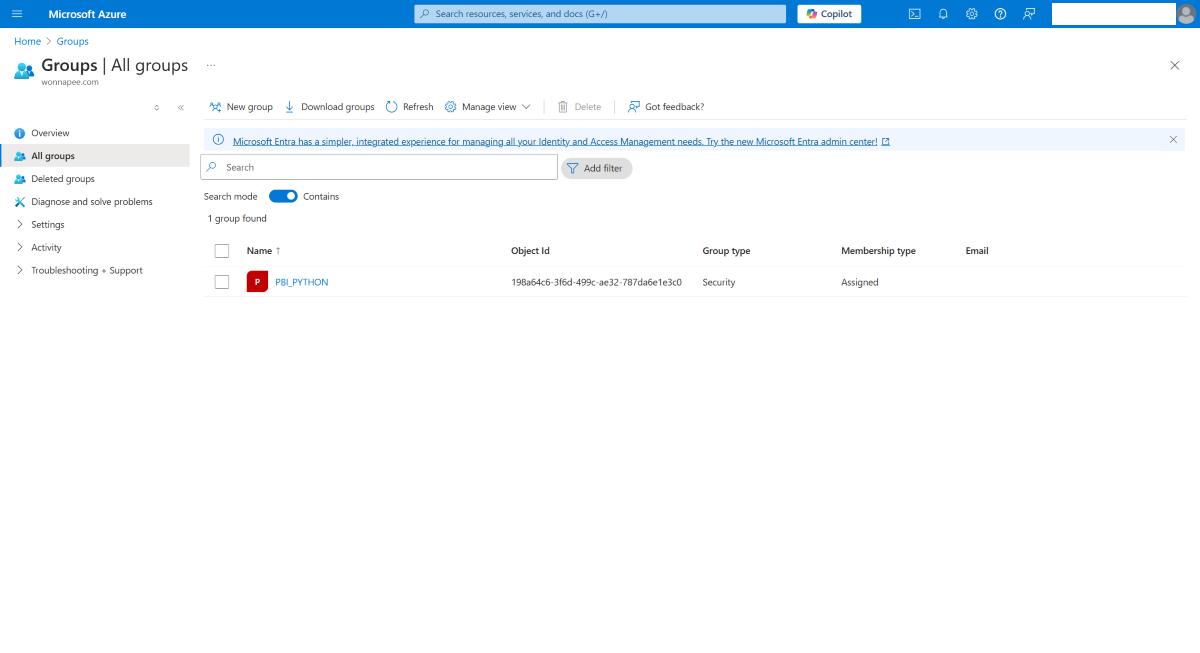
And then register a new security group. This step is also very simple: just select the group type Security, give it a name and at the bottom select the Owner and add your app as Member (you will be able to find the Owner name and Member name through the search).

>>> screen 9
Now that we have our app and security (with app as a member) we need to setup the workspace to allow app to connect to report and semantic models.
Power BI setup
Head to your Power BI account and open the workspace you want to connect to. Once there you need now to save your Workspace ID (note: workspaces are refered to as Groups in Power BI terminology). So to find your "workspace ID / group" check the URL in your browser: just right after ".../groups/xxxxxxxx-xxxx-xxxx-xxxx-xxxxxxxxxxxx" you will find that Workspace ID. Save it.

>>> screen 10
Now that we have the final ID in our combo we need to setup the Power BI side to allow the App to communicate with the service.
Refer to the screen above (screen 10) and click the Gear icon in the upper right corner (also highlighted on the screen).
Once clicked you ll see a side pop-up menu where you need to select Admin portal
So in Admin portal you need the very first section Tenant setting (the first on the left side menu). In this section you need to find two subsections: Developer settings and Admin API settings. See the screen:
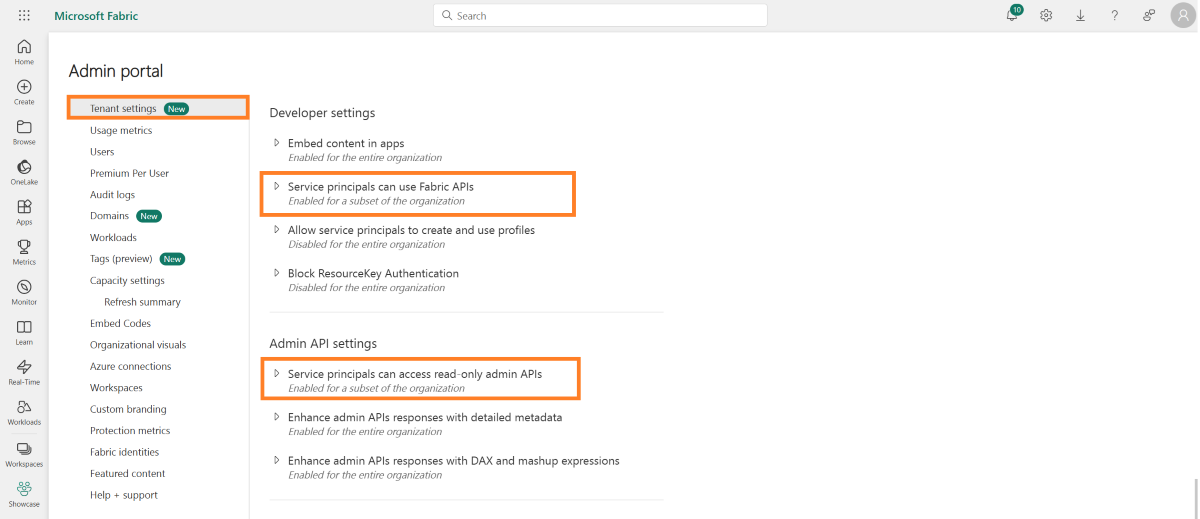
>>> screen 11
You need to Enable both of these subsections for the Security group you created. So to be clear Service principals can access read-only admin APIs allows to access Admin options (eg. Power BI users' names etc.). Service principals can use Fabric APIs allows basic access (like getting a list of reports, semantic models and refresh start etc.).
One more option i would recommend to Enable is:

>>> screen 12
I found it very useful since you can just send your DAX query via API call and get table/value from your model. Think of this option as of quering a DWH you created (aka semantic model). You dont need to reimplement logic in SQL again (you can just use already existing measure to get the data needed).
Workspace access
Last tiny thing we need to do before we can start querying PBI API is add our App (aka Service Principal) to the workspace. To do so: go to your workspace and find the Manage access button (in the upper right corner). After pressing you will get a pop up window where you need to click Add people or groups. And there you can just type in the name of the previously created App (auto search will help you). If you need read-only access you can select Viewer role. But i suppose you would want to select a Contributor role (to be able to refresh datasets).
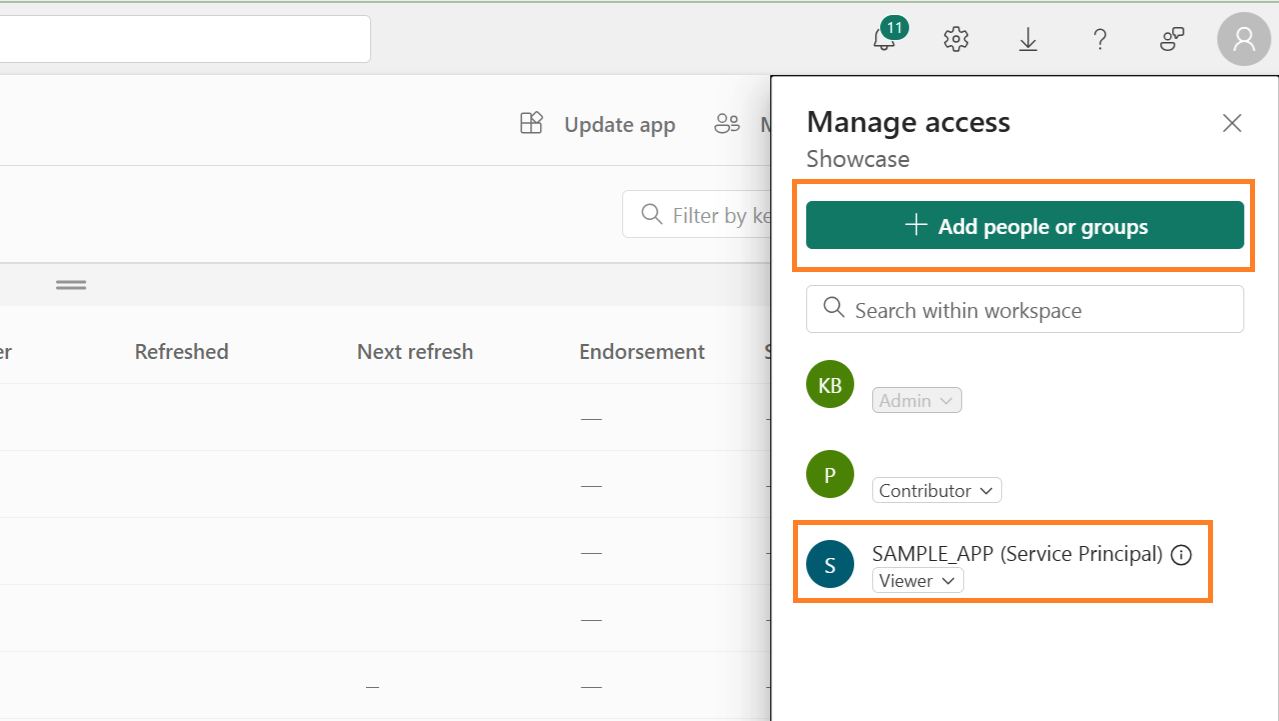
>>> screen 13
Data retrieval
So that said, i hope you enabled these features and now you can control your datasets and query them programmatically. You can grab the script here and run it. Just plug your client_key, client_secret, workspace_id and tenant_id. Thigs you can do now are:
- Refresh dataset whenever you want with minute precision (with Airflow for example)
- Create que of refreshes (most likely with Airflow as well)
- Control the list of your reports and semantic models
- Trace refreshes and keep a track of them in your local DWH
- Control user list (workspace, app)
- Query dataset using DAX (one of my favs features)
One thing to note is that you need to import the following Python packages:
        import PowerBIClient
        import requests
        import json
        from datetime import datetime as dt
        from datetime import timedelta as td

        client_key = "xxxxxxxx-xxxx-xxxx-xxxx-xxxxxxxxxxxx"
        client_secret = "xxxxxxxx-xxxx-xxxx-xxxx-xxxxxxxxxxxx"
        workspace_id = "xxxxxxxx-xxxx-xxxx-xxxx-xxxxxxxxxxxx"
        tenant_id = "xxxxxxxx-xxxx-xxxx-xxxx-xxxxxxxxxxxx"

        power_bi_client = PowerBIClient(client_key, client_secret, workspace_id, tenant_id)

        reports = power_bi_client.get_reports()

        report_id = "xxxxxxxx-xxxx-xxxx-xxxx-xxxxxxxxxxxx"
        users = power_bi_client.get_report_users(report_id)
I would recommend you to try either my class or your own. But anyway try the PBI API.